
PRACTICE AT NUACH
Your Practice Guide
Everything you need to know for a safe and smooth practice at Nuach, from using the space and rigging your apparatus to packing up when you’re done.
Before your first Practice, please read through this guide in full.
IN THIS GUIDE
01 — Before You Practise
What to know before starting
02 — Using the Studio
Access, lights, music & aircon
03 — Equipment & Rigging
Apparatus, rigging points & crash mats
04 — Before You Leave
Cleaning, packing up & closing
01 — BEFORE YOU PRACTISE
A few things before you start.
Practice time is yours to train, explore and revisit skills independently. Before you get started, there are a few things to keep in mind.
01 — Practise within your ability
Practice sessions are for revisiting skills and sequences you have already learnt. Please do not attempt unfamiliar skills, new drops or progressions without an instructor.
02 — Practice is unsupervised
There may not always be an instructor present during your session. You are responsible for practising safely and within your own ability.
03 — Stick to your booking
Please use only the rigging point(s) included in your booking and keep within your booked practice time, especially when others are using the space.
04 — Share the space
Practice may be shared with others. Be mindful of the space around you, keep your belongings clear of the practice area, and give others enough room to train safely.
Not sure about something?
If you’re unsure about any equipment or rigging, just check in with the Nuach team before getting started. We’re always happy to help.
Next: 02 — Using the Studio
Make yourself at home.
Here’s what you need to know about getting in, setting up the space and getting comfortable before you practise.
01 — Getting in
Studio access
#1 Receiving the Access Code
💡Your access code is only valid for one-time access.
This means that if you were to exit the studio during your session, you would not be able to use the same code to enter the studio again. Please check that you have all your belongings before leaving the studio.
The access code will be sent to you at least 1 hour before your session. Drop us a message if you still do not receive it less than 45 minutes before your session.
You may only use the apparatus during the time slot that you have booked. Please enter the studio no earlier than 5 minutes before your session and leave no later than 10 minutes after your session. Students who exceed the 10 minutes after the session will be charged for an additional hour.
If you'd like to extend your session, but are unable to do so on the app, drop us a message on instagram or whatsapp and we'll get that sorted out for you.
#2 Entering the Studio
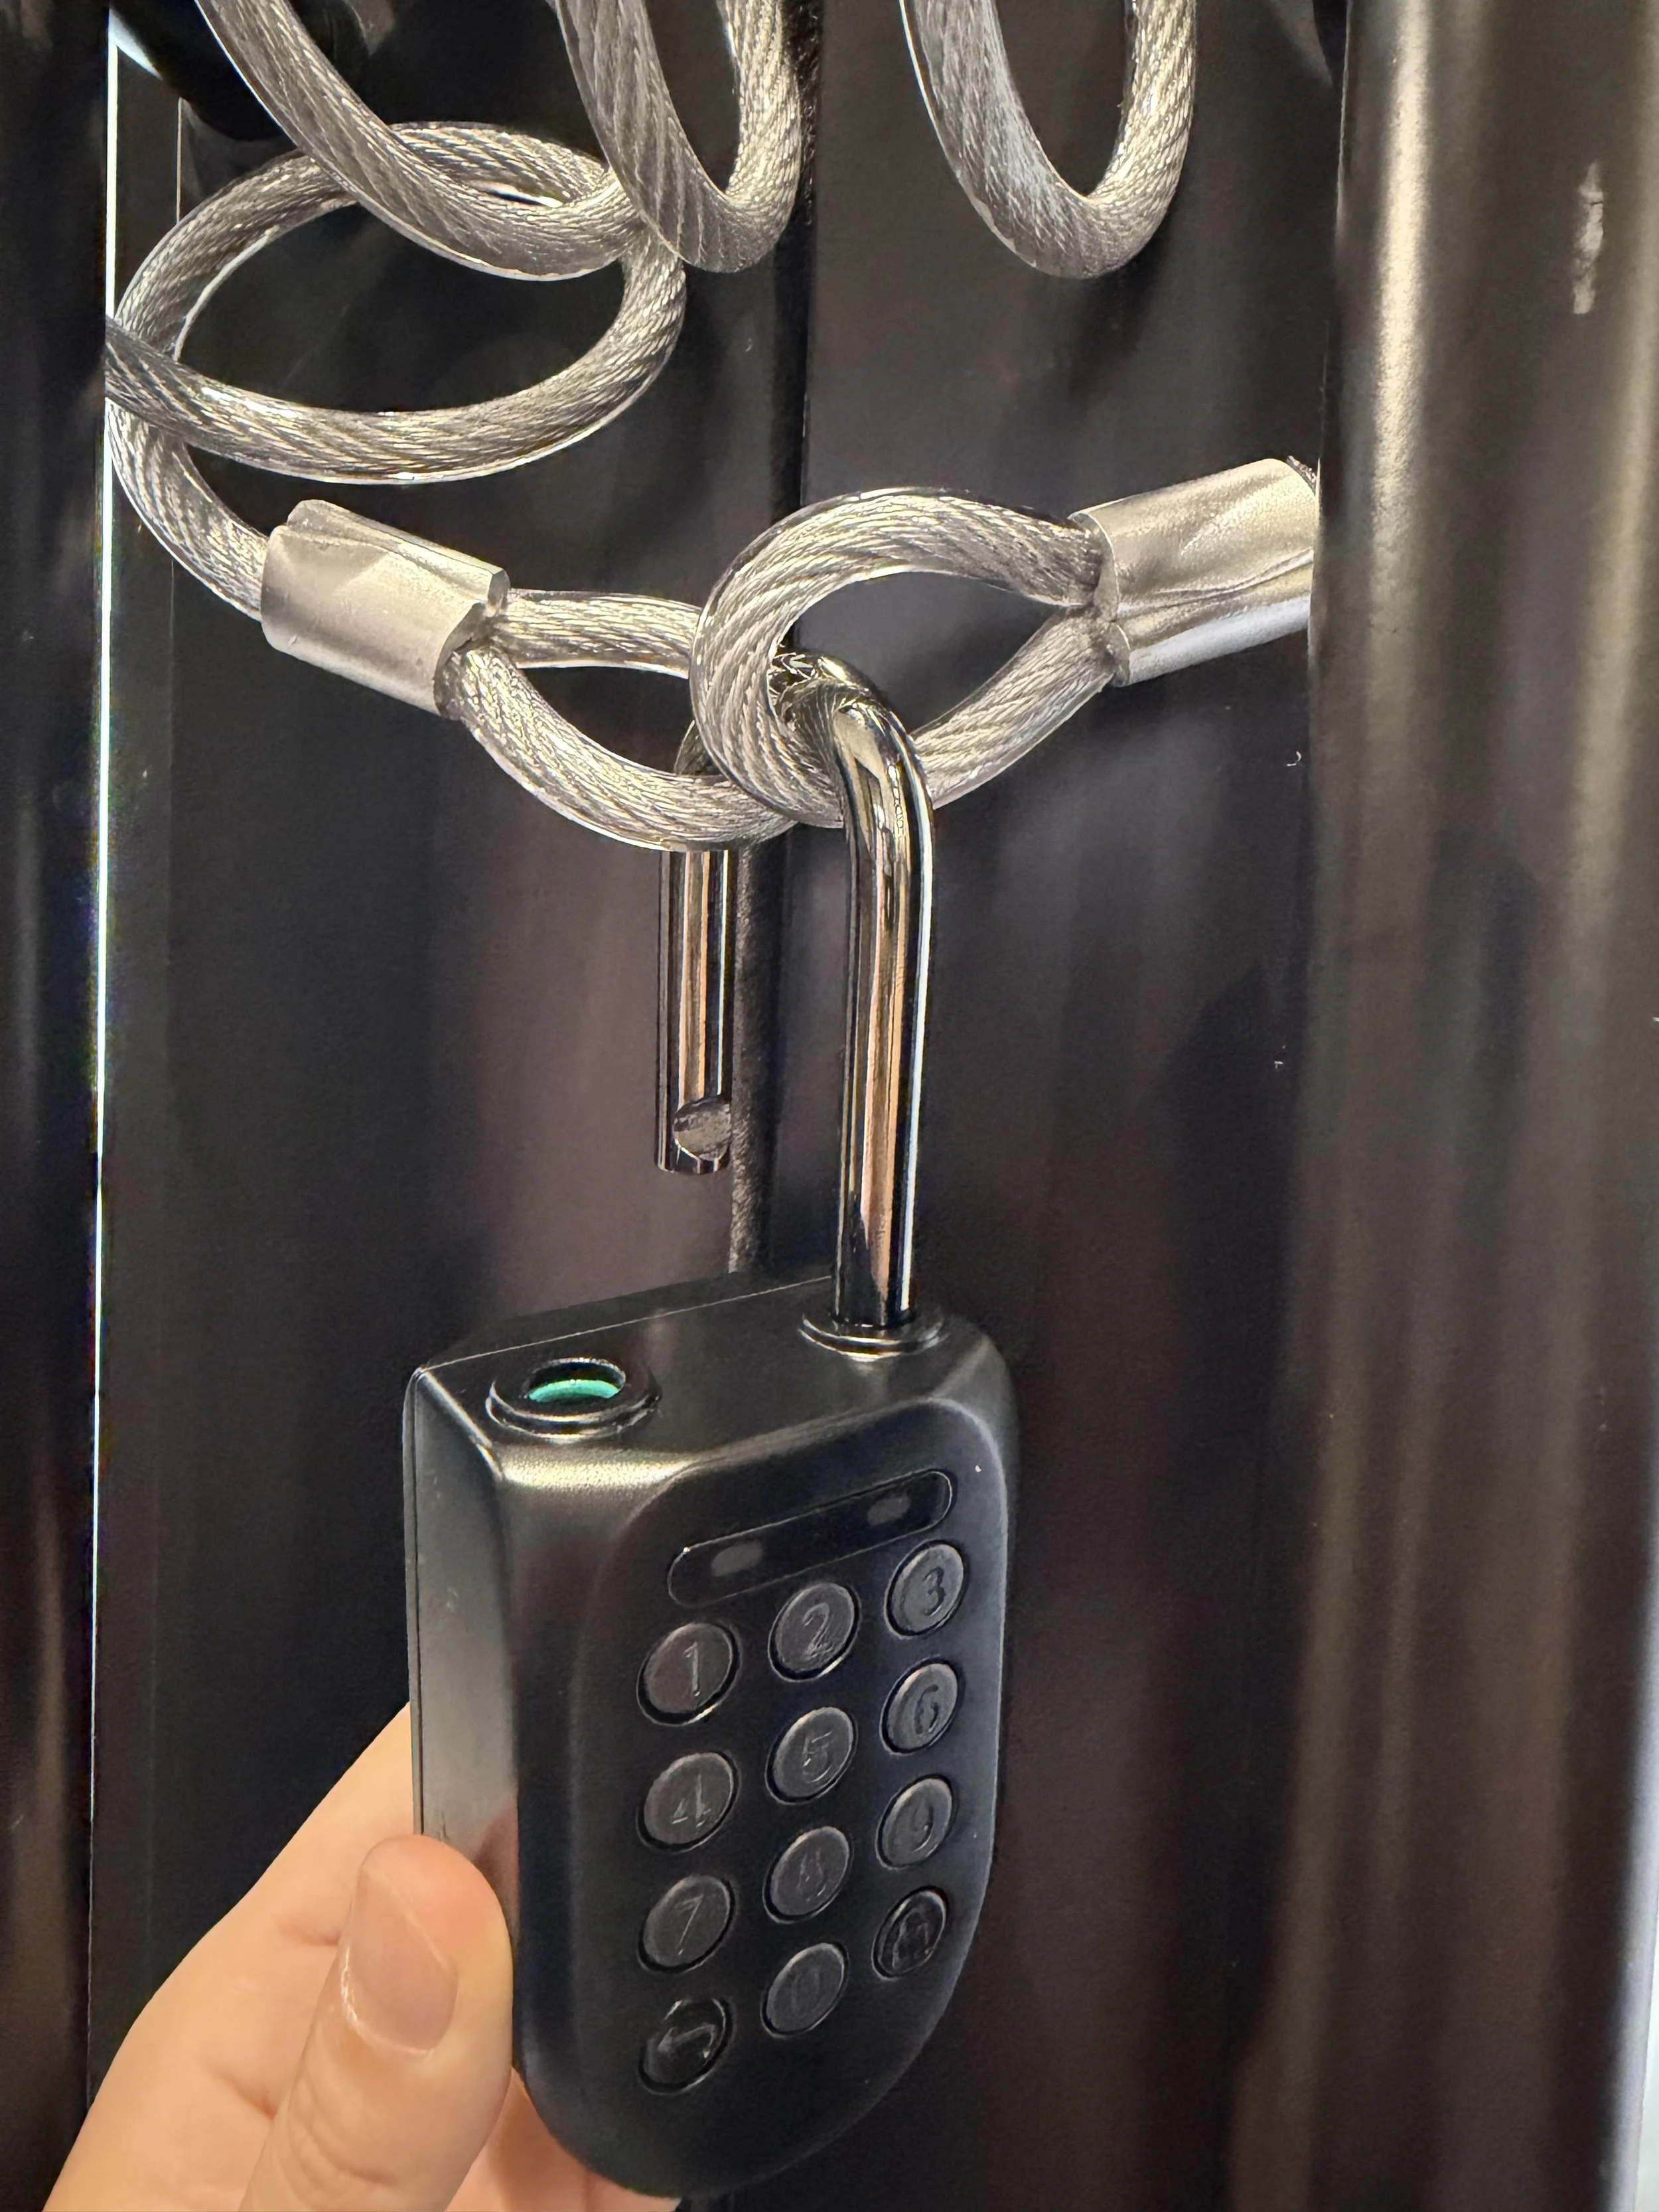
Enter your passcode and **press the 🔒** button to unlock the lock.
Once unlocked, pull the shackle down to release the left side, then remove the padlock from the wire.
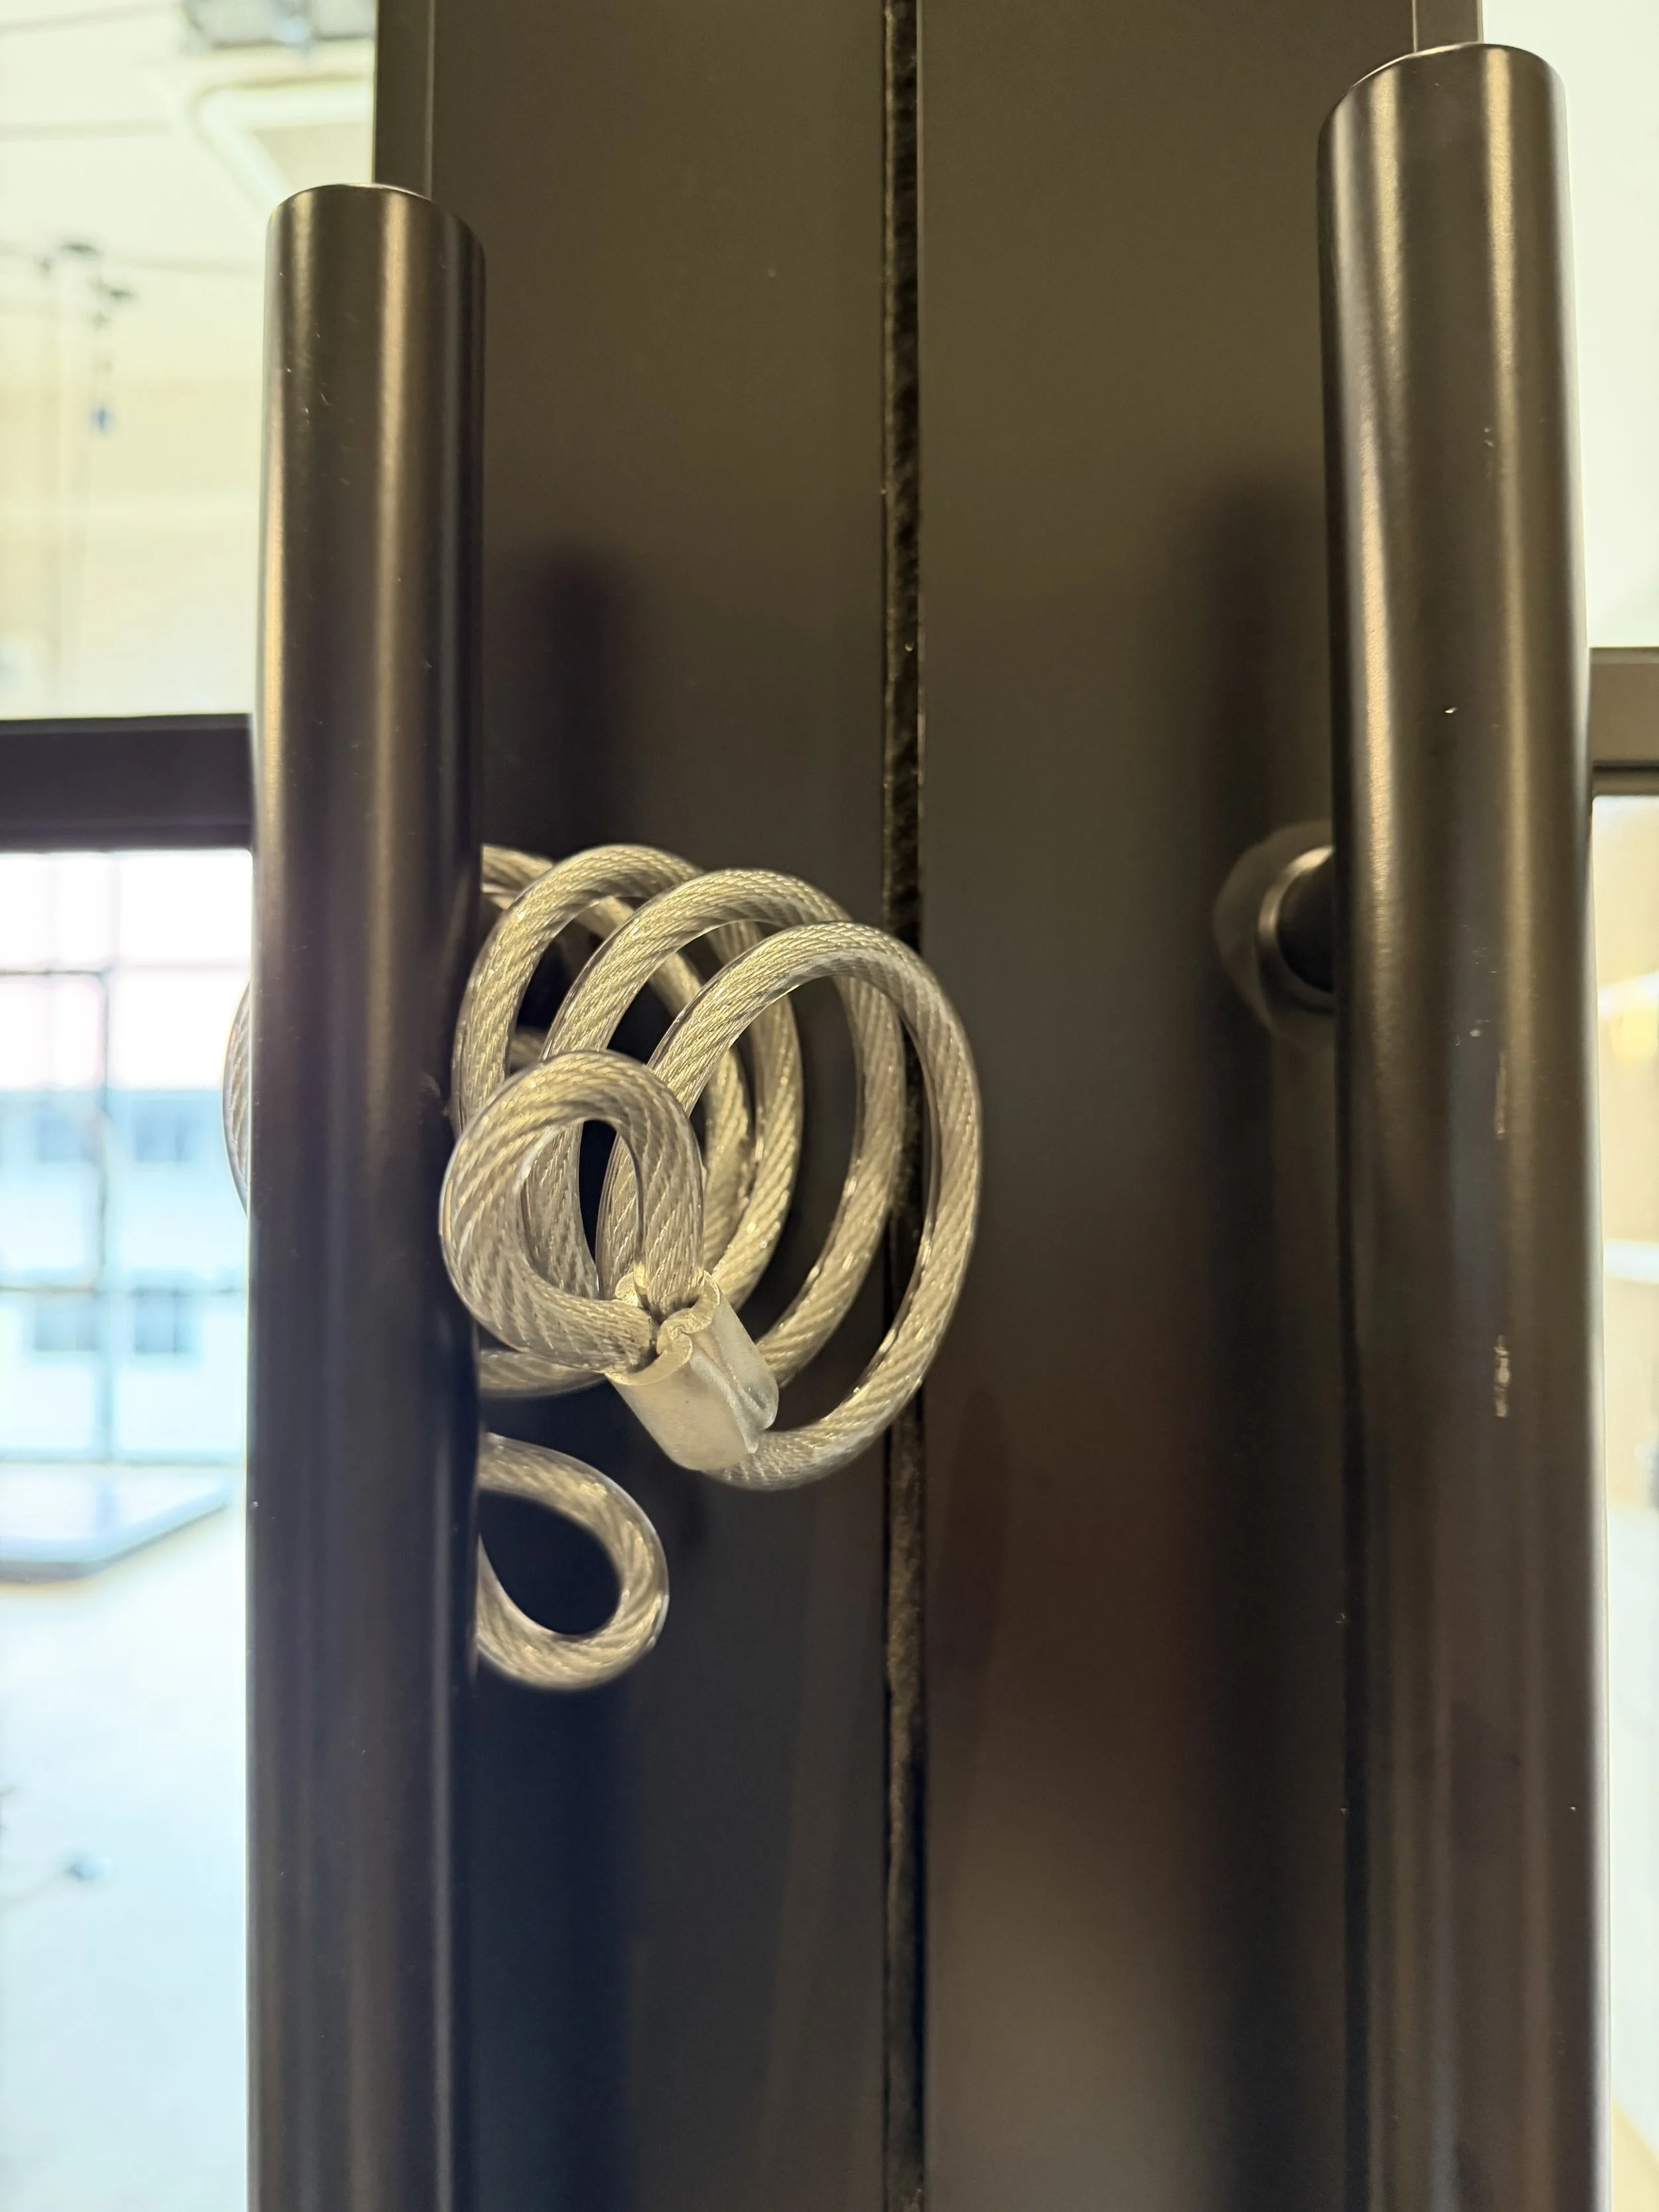
3. Bring the padlock inside with you and leave the wire looped neatly around the door handle, as shown.
❌ Having trouble with your code?
If an incorrect code is entered, the padlock will beep. Try entering your code again. After 5 incorrect attempts, the padlock will temporarily lock and you’ll need to wait approximately 5 minutes before trying again.
#3 — Lights
Main lights
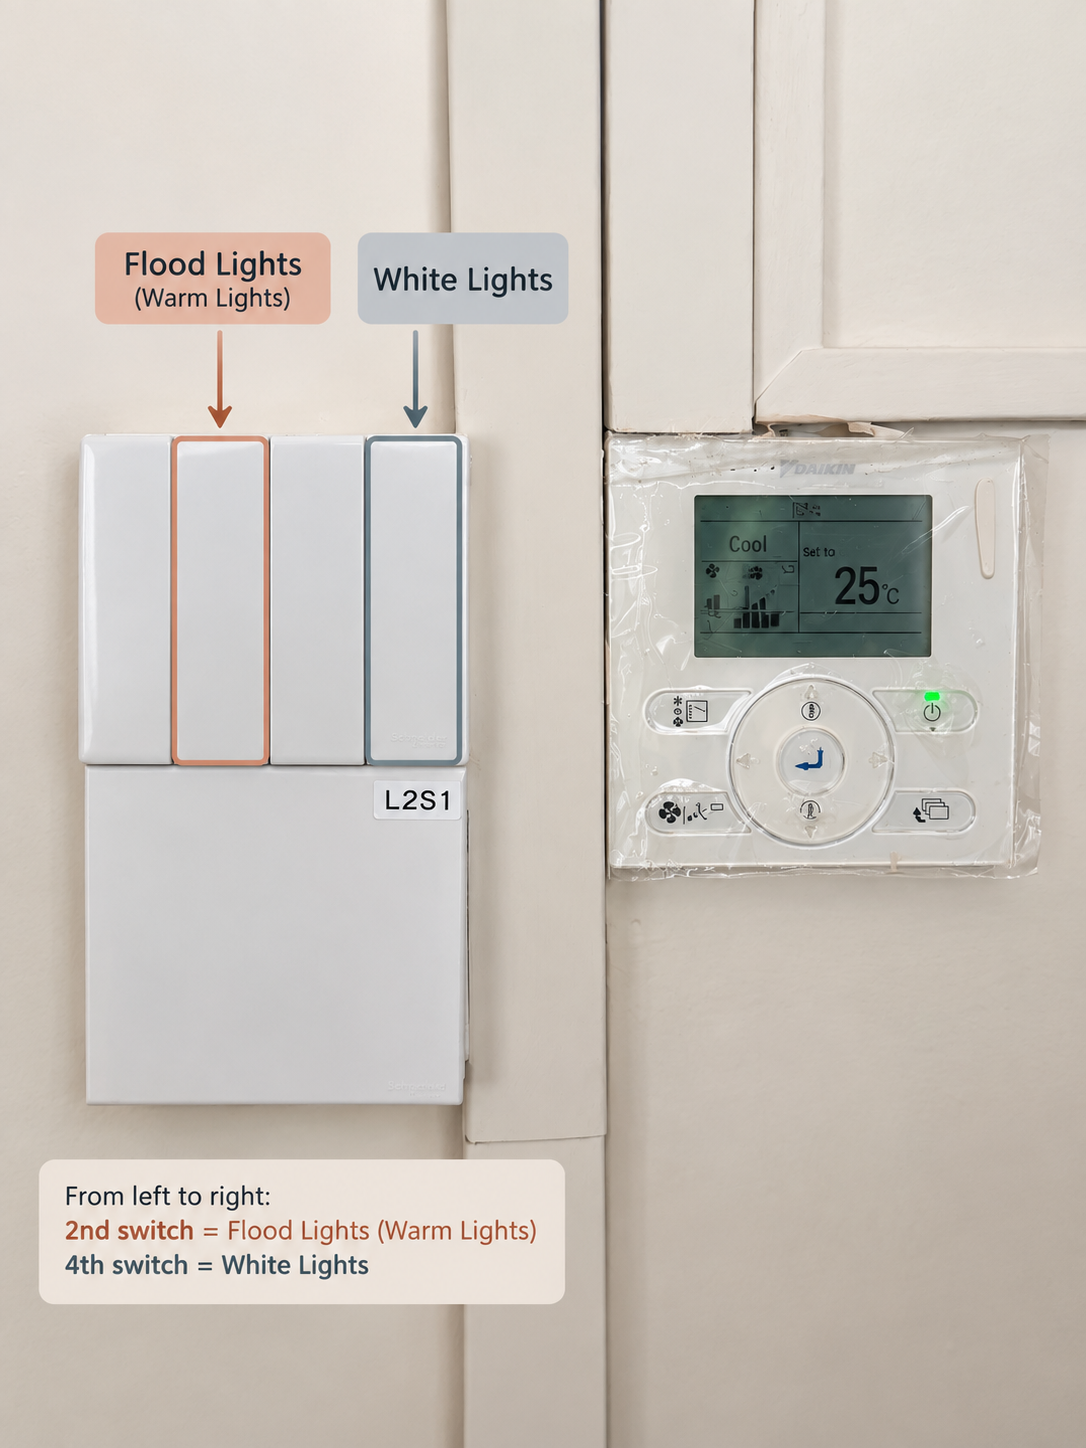
Use the main light switches as needed. During the day, you may find there’s plenty of natural light to practise without them.
Ambient lights
The glass touch controller operates the ambient/LED lights at the back. You’re welcome to adjust these during your Practice.
Please note
Only use the switches/controllers shown below. Please do not adjust or reposition the flood lights.
#4 — Aircon
The aircon controller is mounted on the wall beside the light switches.
Turn on the aircon
Press ON/OFF on the wall controller.Adjust the temperature
Set the temperature as needed during your Practice. We usually keep it at 24c with 2 fan.
#5 — Music
Turn on the main switch, followed by the sound console. Both power points are located by the window.
You may use the Spotify player on the studio phone to play music.
Be mindful of others
If you’re sharing the studio, please keep the volume at a comfortable level and check in with others before changing the music.
#6 - Water & Drinks
Stay hydrated.
Help yourself to water from the dispenser, it’s on us.
Drinks in the fridge are available for purchase. Prices and payment instructions are displayed on the fridge.
03 — EQUIPMENT & RIGGING
Set up for your Practice.
Everything you need to know about choosing your apparatus, setting up your point and using the equipment safely.
#1 - Available apparatus
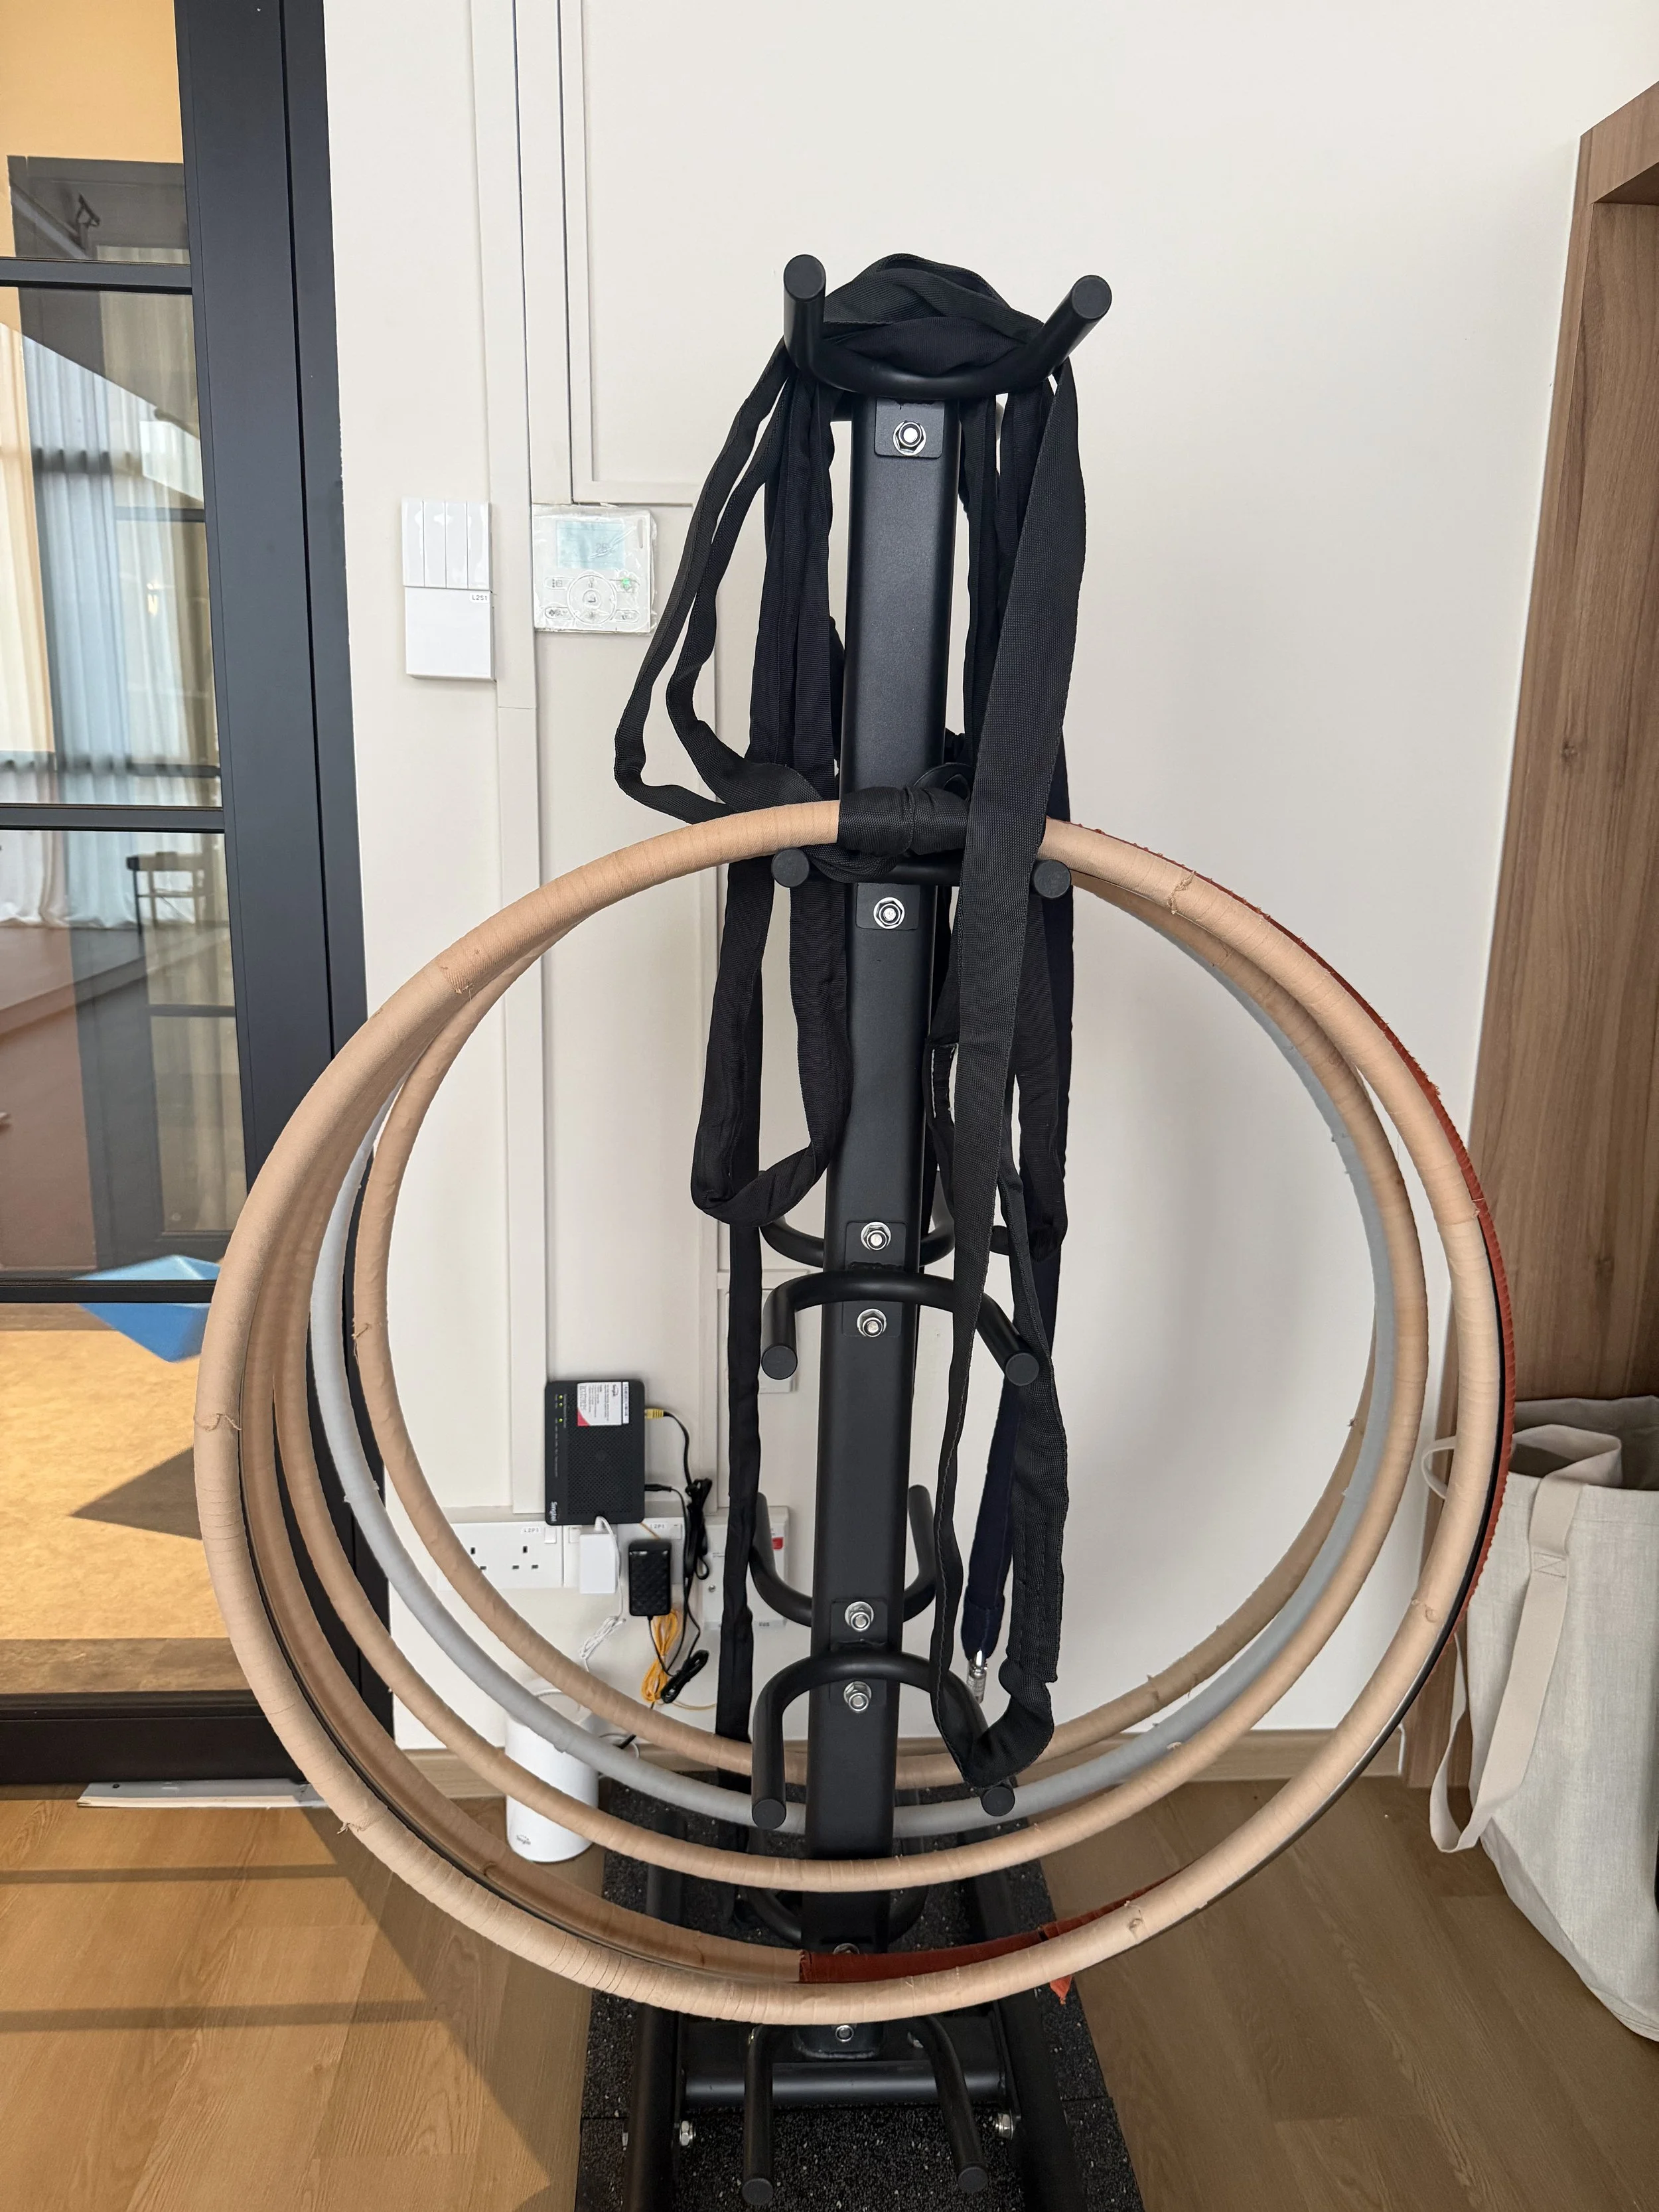
HOOP
Stored on the apparatus bars
HAMMOCK + SILKS
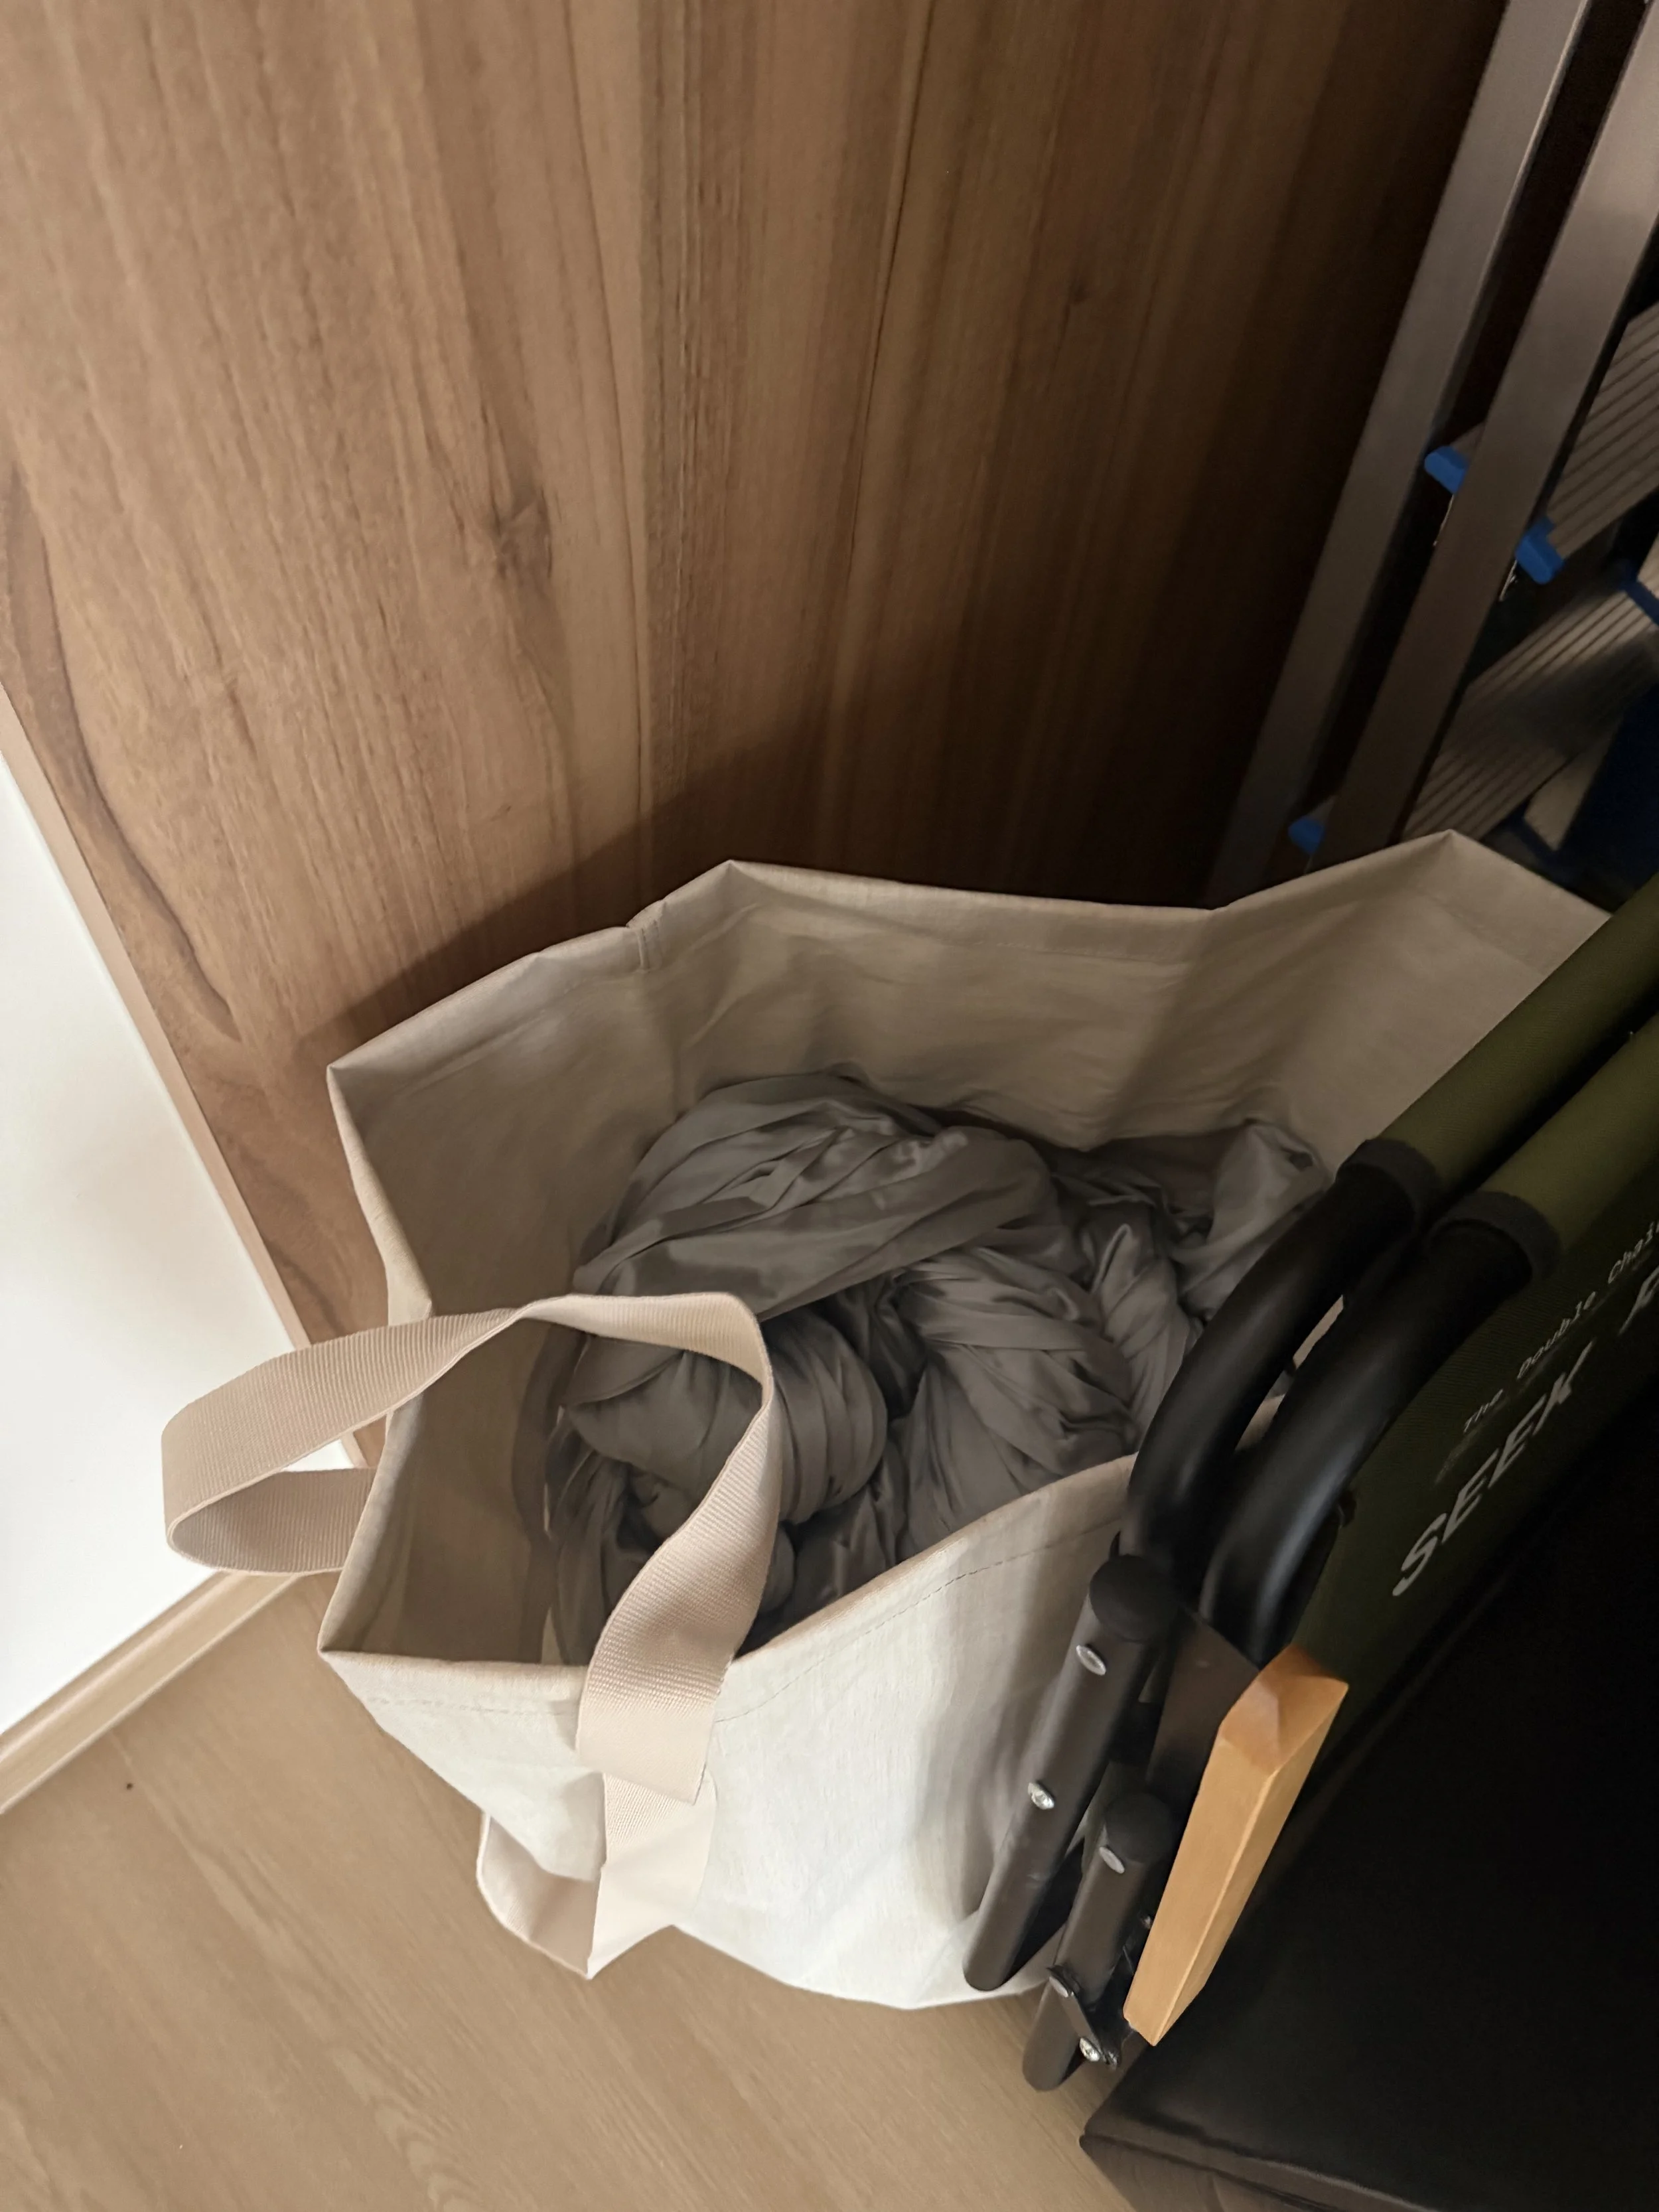
Stored in the laundry basket under the bleachers.
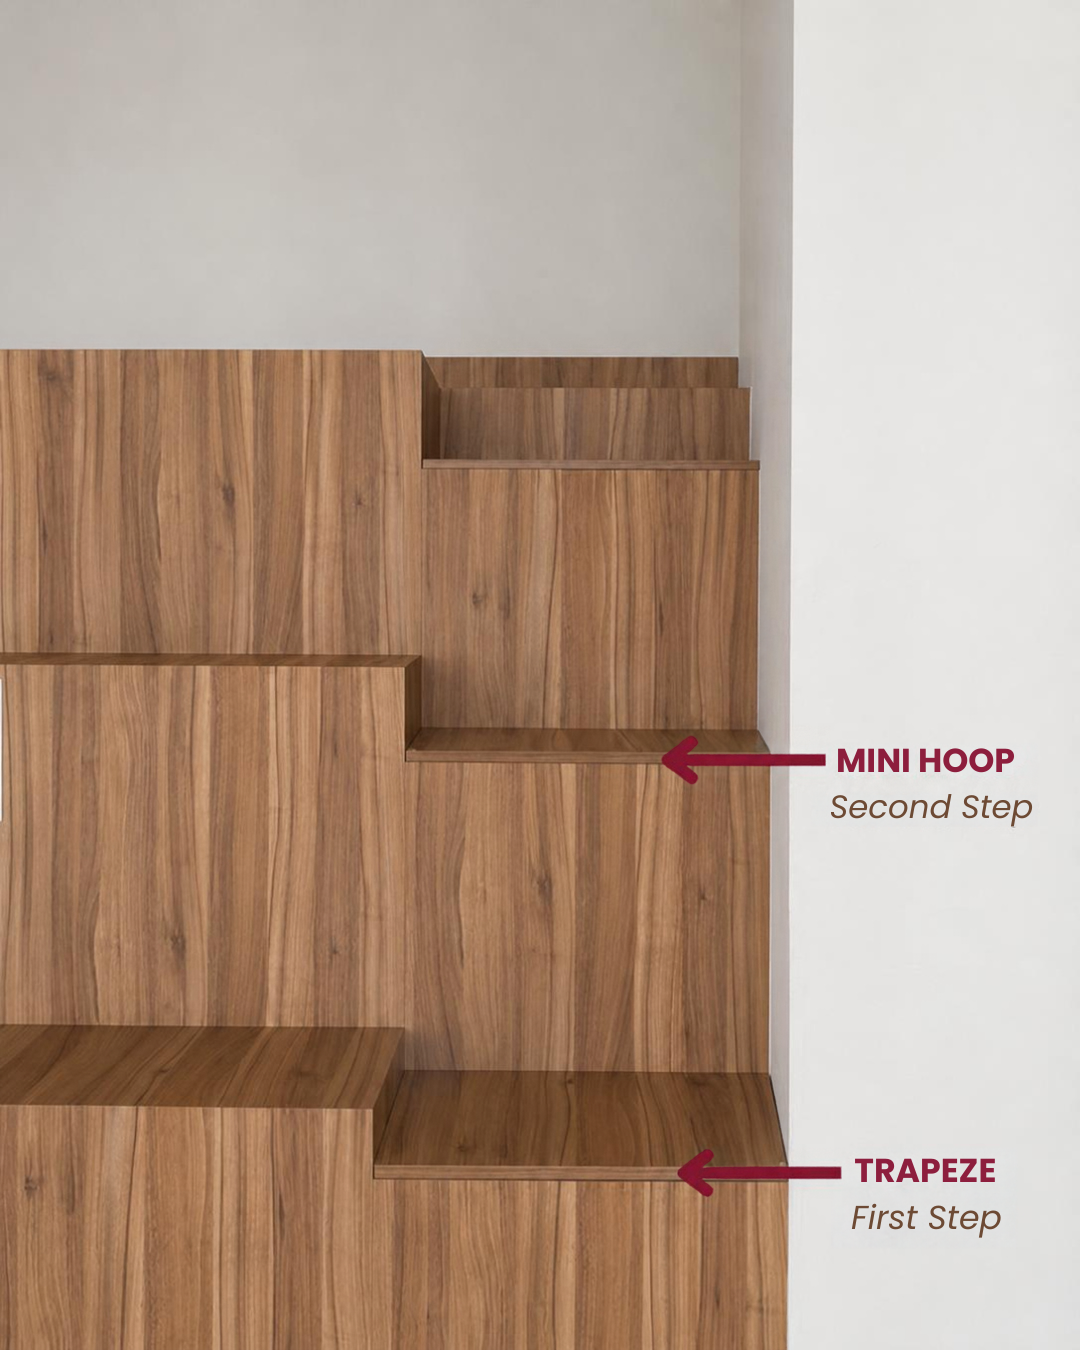
TRAPEZE & MINI HOOP
Storage cabinet by the bleachers
Lift the seat of the corresponding step to access the apparatus
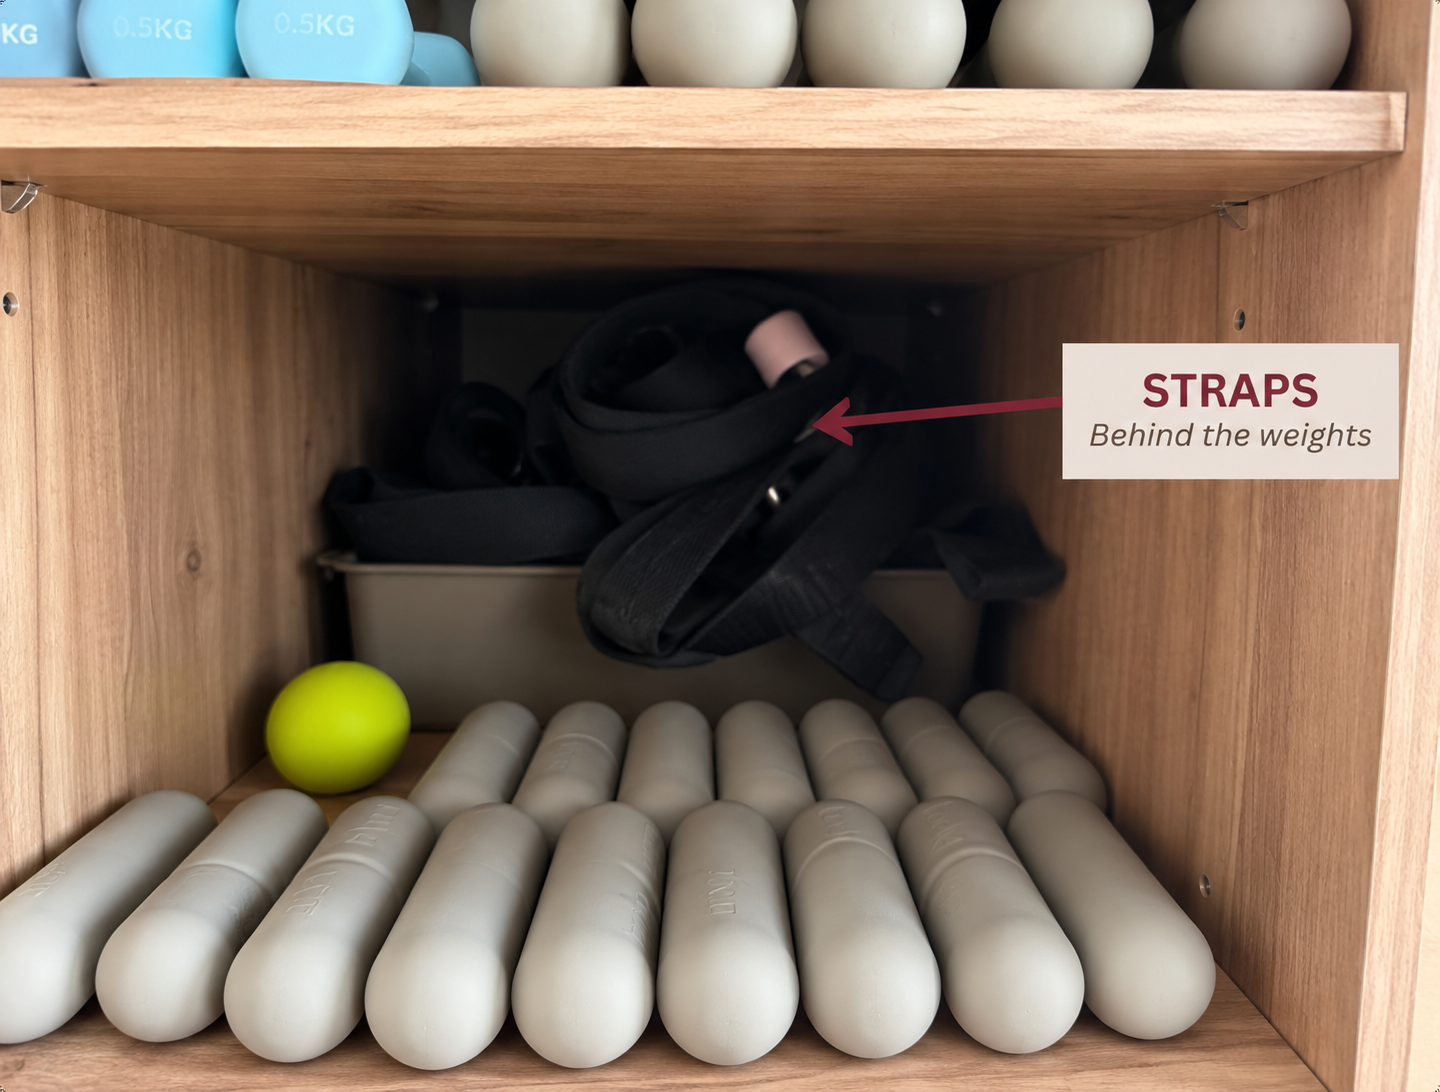
STRAPS
Bleacher storage compartment, with the weights
#2 - Crash Mats
Place a crash mat directly beneath your apparatus before you begin your Practice.
Crash mats are stored under the bleachers. Please take care when removing and returning them, and avoid pulling or shifting the bleacher structure.
Do sanitise, wipe down and return the mats after use.
#3 - Rigging Your Apparatus
Nuach has 5 rigging points, each with an adjustable pulley system so you can lower the point, attach your apparatus and raise it to your preferred height.
Not sure how to rig something?
Please don’t guess. If you’re unfamiliar with the rigging system or unsure about any part of the setup, check with the Nuach team before using it.
A — Lowering & Raising Your Rigging Point
Identify the working rope attached to the Figure 8. Untie the two knots.
-Blue Figure 8 are spinning points and Red Figure 8 are for static points.Lower the point, and attach your apparatus to the manual-lock carabiner on the Rigging Point.
Hoist your apparatus.
Do check that all attachments are taut.
Watch this video on how to lock ropes to secure the point:
B — Attaching Your Apparatus
Use the correct attachment for your apparatus.
Lower the rigging point to a comfortable height, then attach your apparatus as shown below.
Turn carabiner anti-clockwise to unlock
Insert the strop (hoop, mini hoop) / carabiner (hammock) / figure 8 (silks) / triangle plate (trapeze, straps)
Turn clockwise to lock. Snap to check that it is fully locked
Please note
The manual-lock carabiner attached to the swivel stays on the rigging point. ❌ Do not remove it when changing apparatus.
#4 — Before You Practise
Give everything one final check.
Before putting your full weight on the apparatus:
Check that all carabiners are fully closed and locked.
Check that your apparatus and hardware are correctly attached.
Make sure the working rope is securely tied off.
Make sure your crash mat is directly beneath you.
Gently weight-test your apparatus before beginning your Practice.
04 — BEFORE YOU LEAVE
Leave it ready for the next person.
A few quick things to do at the end of your Practice to help keep the studio clean, tidy and ready for everyone.
01 — Clean Your Equipment
Sanitise/wipe down the apparatus and crash mats you used.
Please clean any equipment you’ve used before putting it away.
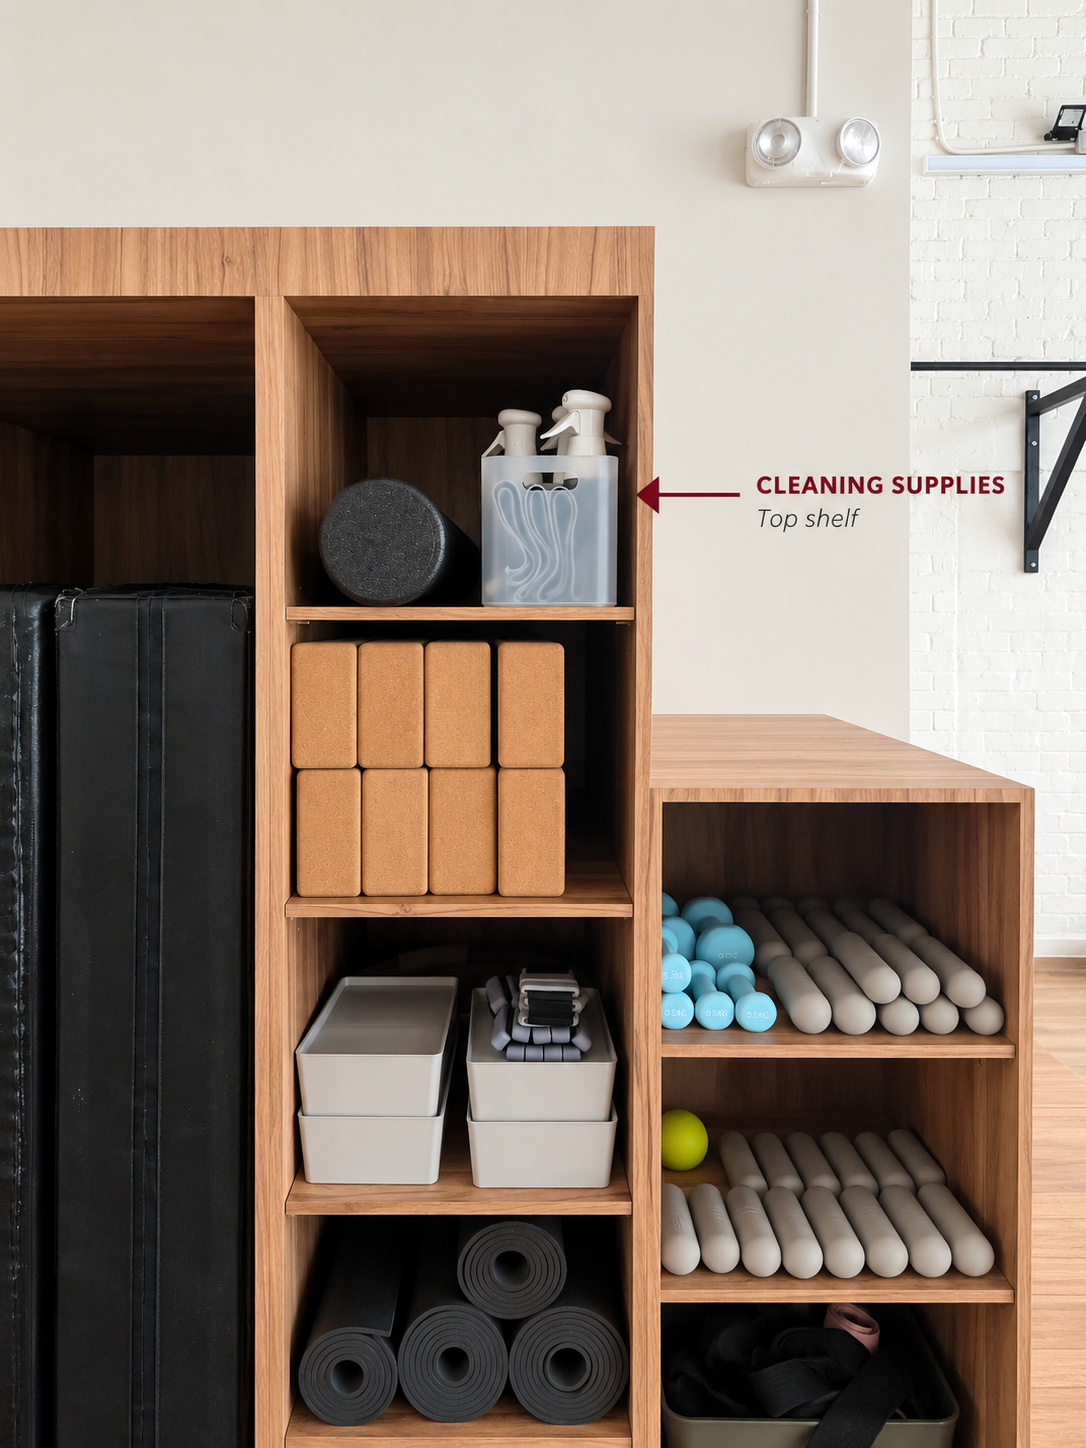
Hoop · Trapeze · Mini Hoop: Spray sanitiser onto a cloth, then wipe down the apparatus.
Hammock · Silks · Straps : Lightly spray the sanitiser directly onto the apparatus.
Pilates / Yoga Mats: Spray the white bottle onto a cloth, then wipe down the mat before rolling it back up.
Yoga Blocks: Spray the white bottle onto a cloth, then wipe down all sides of the blocks before returning them.
02 — Return Your Apparatus
Lower your point, remove your apparatus and return everything to its designated storage.
03 — Reset Your Rigging Point
Reattach the weight and raise the rigging point back up.
❌ Do not pull a empty point up without locking a weight or apparatus on it
04 — If You’re the Last to Leave
Before you go, please check that:
✓ All apparatus and equipment have been cleaned and returned
✓ Crash mats have been wiped down and returned under the bleachers
✓ All rigging points have been reset and raised
✓ The sound console and main switch are off
✓ The aircon is off
✓ All lights and ambient/LED lights are off
✓ You’ve taken all your belongings with you
05 — Locking Up
Bring the padlock outside
Take the padlock with you and close the studio door behind you.Secure the door
Loop the wire back through the door handles and attach the padlock.Lock the padlock
Insert the left side of the shackle back into the padlock and press down firmly until it locks.Give it a quick check
Pull gently on the wire/padlock to make sure the door is securely locked before you leave.
House Rules
For the safety of staff and students, the studio is monitored by CCTV cameras.
A single booking is for a single point. Please avoid using more points than you have booked for.
Food and drinks are not allowed in the practice area.
Remove all accessories (rings, bracelets, watches) to prevent damage to the apparatus.
Maintain good hygiene by washing your hands and feet before and after your session.
Please bring any food and drinks trash along with you when you leave the studio, and avoid disposing of them in the studio’s bin.
That’s it. ♡
Thanks for taking care of the space and leaving it ready for the next person.
Enjoy your Practice.